Making Black Powder Paper-Cartridge Boxes
by Roy
Seifert
Click here to purchase a zip file with this and
all Kitchen Table Gunsmith Articles.
Disclaimer: This
article is for entertainment only and is not to be used in lieu of a
qualified gunsmith. Please
defer all firearms work to a qualified gunsmith.
Any loads mentioned in this article are my loads for my
guns and have been carefully worked up using established guidelines and
special tools. The
author assumes no responsibility or liability for use of these loads,
or use or misuse of this article.
Please note that I am not a
professional gunsmith, just a shooting enthusiast and hobbyist, as well
as a tinkerer. This
article explains work that I performed to my guns without the
assistance of a qualified gunsmith.
Some procedures described in this
article require special tools and cannot/should not be performed
without them.
Warning: Disassembling
and tinkering with your firearm may void the warranty.
I claim no responsibility for use
or misuse of this article. Again,
this article is for entertainment purposes only!
Tools
and firearms are the trademark/service mark or registered trademark of
their respective manufacturers. Click on any
blue text to go to a
product/seller web site.
Introduction

If
you have been keeping up with my articles you know I have been making paper
cartridges for my three black-powder revolvers (refer to my article
Making Black Powder
Paper Cartridges). I wanted
to make (almost) period-correct cartridge boxes for my paper cartridges.
These won’t be exactly period correct, but they will be functional and
look nice. I plan to store them in
my black-powder revolver display case.
Making Period Cartridge Boxes
There are many sources for period paper-cartridge boxes on the Internet.
I decided to make my own.
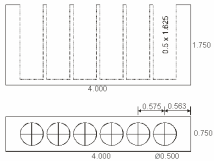
The above figure shows the dimensions for the wooden cartridge insert that holds
six paper cartridges. I made the
ends a bit longer so I could clamp the wooden blank in my CNC mill to drill the
holes. I can purchase wood that is
3/4” thick which is perfect for the wooden boxes.
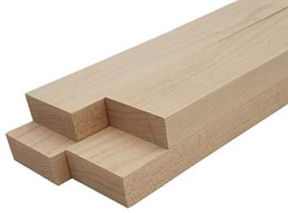
I
purchased four 3/4 x 2 x 12 hardwood boards from
Amazon.com. Because each board
is 12-inches long I can get three cartridge boxes out of each board.
I
trimmed a board to 1 3/4” wide and cut three 4-inch blocks.
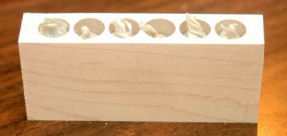
I placed a 4-inch block onto my CNC mill table and squared the block.
I located the center of the block, then used a 1/4-inch square end bit to
mill the holes. After the holes
were milled, I placed a paper cartridge in each hole.
I
purchased some brown paper from
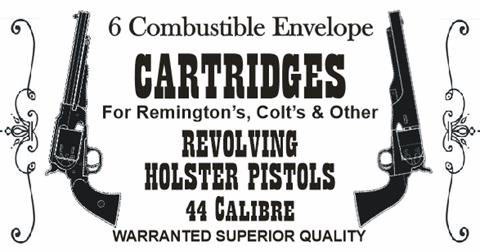
Amazon.com and printed a label for the cartridge box.
I cut out the label and wrapped the cartridge box like a present.

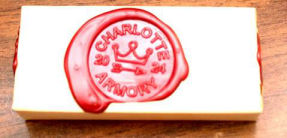
I
ordered a custom wax seal and sealing wax from Temu.
I sealed the ends of the cartridge box wrapping with wax, and sealed the
back seam also with sealing wax and impressed it with the custom seal.
This is perhaps not exactly period correct, but often cartridge boxes
were dipped in wax to completely seal and water-proof them.
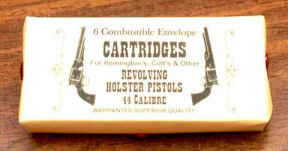
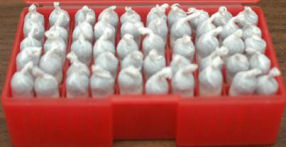
Here is the completed cartridge box.
Again, it’s not exactly period correct, it's more of a fantasy box, but it does
look nice.
|
