Cleaning Up a 1947
Marlin® 39A – Part II
by Roy
Seifert
Click here to purchase a CD with this and
all Kitchen Table Gunsmith Articles.
Disclaimer: This
article is for entertainment only and is not to be used in lieu of a
qualified gunsmith. Please
defer all firearms work to a qualified gunsmith.
Any loads mentioned in this article are my loads for my
guns and have been carefully worked up using established guidelines and
special tools. The
author assumes no responsibility or liability for use of these loads,
or use or misuse of this article.
Please note that I am not a
professional gunsmith, just a shooting enthusiast and hobbyist, as well
as a tinkerer. This
article explains work that I performed to my guns without the
assistance of a qualified gunsmith.
Some procedures described in this
article require special tools and cannot/should not be performed
without them.
Warning: Disassembling
and tinkering with your firearm may void the warranty.
I claim no responsibility for use
or misuse of this article. Again,
this article is for entertainment purposes only!
Tools
and firearms are the trademark/service mark or registered trademark of
their respective manufacturers. Click on any
blue text to go to a
product/seller web site.
Introduction
Wow, it’s been 10 years since I purchased this rifle.
It’s a great shooter; very accurate and
the action is butter smooth. I took
it out of the gun safe to give it a quick going over and decided to make a few
more improvements. I wanted to keep
it as close to the 1947 pattern as possible, but I did make a few changes.
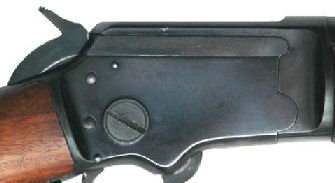
Re-Bluing the Receiver
As mentioned in my previous article, this rifle did have some surface rust
mostly on the right side of the receiver.
I tried to polish out the rust and cold blue it, but the cold blue
solution combined with the original bluing created more rust!
I was finally able to make it look somewhat decent, but it didn’t come
out perfect. Over time that cold
blue job started to rust, so I decided to do it over.
I
completely disassembled the right receiver half.
This half had all the action parts except the bolt.
Then I removed the bad cold blue with 400-grit wet/dry sandpaper and
polished with a buffing wheel and 400-grit polish.
I
degreased the receiver with acetone, then heated it with a heat gun.
I used a large cotton dauber to apply Brownell’s Oxpho-Blue liquid.
I dipped the dauber into the solution and applied it liberally on the
steel for 60-seconds. I then wiped
off the excess liquid and polished the metal with 000 steel wool.
I repeated the process using a new dauber.
At first the bluing was splotchy, but eventually it came out even after
10 applications. After the final
polish with steel wool, I applied some Minwax finishing wax to protect the newly
blued surface.
If the
bluing doesn’t hold up, I’m going to try the process found on YouTube by
Ginsboy2003: https://www.youtube.com/watch?v=X-CDOJF-TmY
Following his process, I would remove the old bluing, apply Mark Lee
Express Brown #2, then apply the Oxpho-Blue.
The browning provides durability, and the cold blue provides the color.
Changing the Rear Sight
I
really didn’t like the Marble’s leaf sight, so I replaced it with a Marlin
folding leaf sight I had from my 336.
I drifted out the Marble’s sight and installed the Marlin sight.
I adjusted the Marlin sight so when I looked through the peep it was
aligned with the front sight.
Adding
Sling Swivels
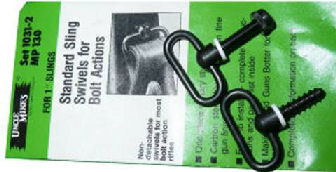
In my
box of sling swivels, I found an old set of Uncle Mikes fixed 1-inch sling
swivels. The later versions of the
39A came with fixed sling swivels.
This package came with two swivels; one with a wood screw to install into the
butt stock, and one with a 10-32 machine screw for the fore end cap.
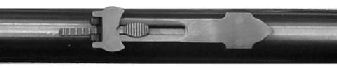
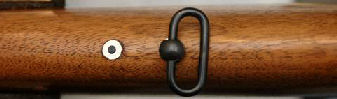
I
carefully marked the center bottom of the fore end cap and milled a 0.159” hole,
then tapped the hole with a 10-32 tap.
The machine screw swivel was not threaded all the way to the stud, so I
took a 10-32 die and ran it backwards over the threads to cut threads up against
the stud. I trimmed the excess
threads with a Dremel cutoff wheel and installed the swivel with the white
spacer. The spacer ensured I
installed the swivel perpendicular to the barrel. I used a fine sanding drum on
my Dremel tool to grind the end of the shaft flush with the inside of the end
cap.
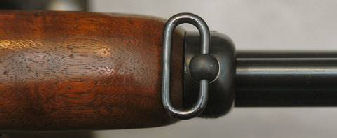
I
removed the swivel from the end cap, cleaned the threads of the stud and end cap
with acetone, applied some JB Weld epoxy to the threads, then reinstalled the
swivel. I allowed the epoxy to cure
for 24 hours, then reassembled the rifle.
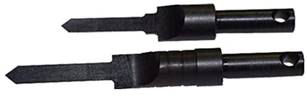
For
the rear sling swivel, I placed some painter’s tape on the bottom edge of the
butt stock so the center of the tape was 1 1/2-inches below the Marlin bull’s
eye. The tape helped to prevent the
wood from splintering. I used a
center-punch to mark where to drill in the stock and used the smaller swivel
base drill bit to drill into the stock.
I
installed the white spacer, applied some grease to the threads and screwed the
swivel into the stock. My rifle now
has sling swivels that look factory.
Making
a Sling
I made
my own sling using webbing and plastic hardware I had on hand.
I cut 44” of 1 1/2” green nylon webbing to make the sling.
I use a lighter to seal the ends to prevent them from fraying.
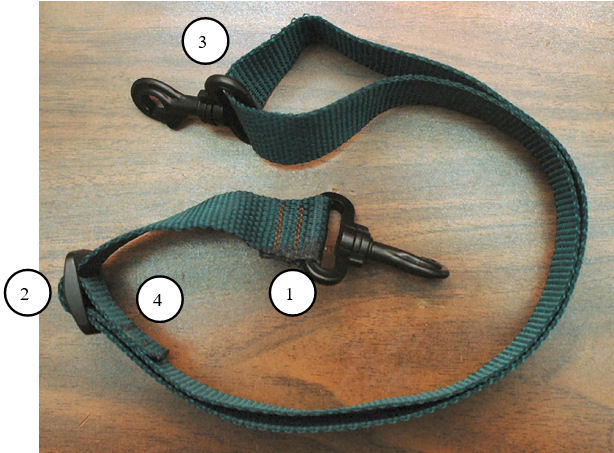
In the
above photo I tried to show how I assembled the sling.
-
I fed one end of the
webbing through a swivel hook and stitched it.
This hook is attached to the stock sling swivel.
If you don’t have access to a sewing machine strong enough to stitch
webbing, you can use a tri-glide to hold the end.
Strapworks has a video showing how to do this:
https://www.youtube.com/watch?v=3xB86Lm7vBw
-
I fed the other end of
the webbing through a tri-glide.
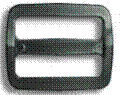
-
Then fed the end through
another swivel hook. This hook is
attached to the fore end cap sling swivel.
-
I fed the end through
the center-bar of the tri-glide and stitched it in place.
I move
the tri-glide up or down on the strap to adjust the length of the sling.
When stored in my gun safe, the tri-glide is at the bottom of the sling
keeping the sling “dressed” so it doesn’t drag on the floor or get tangled with
other rifles. To carry the rifle, I
move the tri-glide up the webbing until the sling is at the desired length.
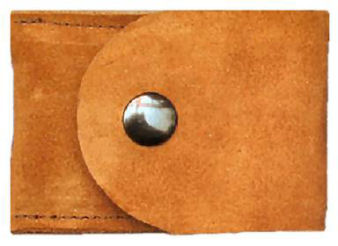
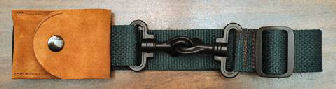
In my
prior article, I replaced the Lyman tang peep sight with a Marbles tang peep
sight. I made a small pouch out of
chap leather to carry the extra apertures that came with the sight.
The pouch fits on the sling so I always have those apertures handy and
don’t lose them. I keep them in a
small plastic bag so they won’t rust being next to the leather.
The pouch is large enough that I can carry extra parts or small tools.
Replacing the Front Sight Base, Front Sight, and Adding a Hood
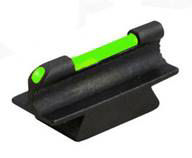 
I
decided to replace the white-line front sight with a green fiber-optic sight.
I’m a big fan of fiber optic sights and green seems to work best for me.
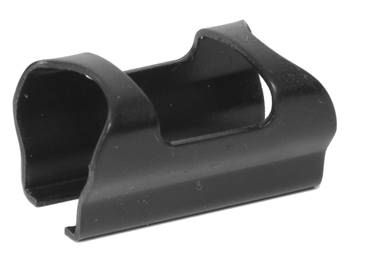
I purchased a front sight and open front sight hood from ebay.
The front sight was designed specifically for the 39A, and the open hood
allows light to illuminate the green fiber optic.
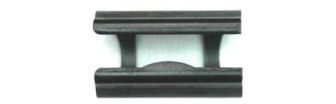
The
bottom of the hood has a lip that fits into a corresponding groove on one side
of the hood channel. My 39A front
sight base did not have that groove; I’m sure this was a later factory
enhancement. I replaced the front
sight base with the base I removed from my Marlin 336 when I converted it into a
takedown rifle. (Refer to my article
Building a Backpacker
“Scout” Rifle.) Apparently
on earlier large caliber rifles the hood would shift and eventually come off
during recoil, so Marlin added the lip.
The front sight base fit perfectly on my 39A barrel.
I used
a 65-degree dovetail file
#080-648-165 I purchased from Brownell’s to remove a small amount of metal
from the sight dovetail until it fit into the base.
I filed the sight, NOT the base.
This was a trial and error process.
After 3-5 strokes with the file I tested the sight for fit.
When the sight just started to fit in the dovetail, I used a brass punch
to finish drifting it in place.

This
rifle was already sighted-in for 50-yards.
The fiber-optic front sight is lower than the sight I made, which will
change the impact of the bullet. I
used my Bushnell Universal Laser Boresighter I purchased from MidwayUSA.com
#636671 to
see where the existing sights were adjusted in relation to the red laser dot.
After I installed the new front sight, I adjusted the peep and blade
sights to the same position in relation to the red dot.
The
Bushnell boresighter fits in the end of the muzzle and comes with expandable
arbors to fit bores from .22 through .50.
I don’t like the in-chamber boresighters because I’ve had problems in the
past with the laser reflecting off the bore and causing interference which makes
the dot difficult to see.
Adding
a New Butt Pad
In
spite of my efforts to repair the plastic butt plate, it still broke, so I
decided to add a rubber butt pad. I
purchased a Marlin butt pad from MidwayUSA
#680699
which required some minor fitting.
You can see in the above photo I didn’t get the angle of the toe exactly
correct, but it still looks good.

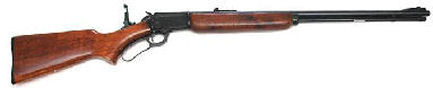
In the
above photo you can see what the rifle looks like with all improvements
installed. The sight hood and sling
swivels make the rifle look factory, and the green fiber-optic front sight and
sling add to the utility of the rifle.
I am very pleased how my rifle came out.
Carrying Spare Ammo

For
the range I bring along my Spee-D-15 loader I purchased from MidwayUSA.com
#511932.
This loader has 8 tubes arranged around a
central axis giving me 120-rounds. I
remove the inner magazine tube from the rifle, rotate the spout on the loader to
align with one of its tubes, and with the muzzle pointed away from me, place the
spout at the end of the magazine tube, tip up the loader, and 15 rounds slide
down into the tube. If I want to
fill the magazine tube to full capacity, I can top it off from a box.
The Spee-D loader is
much too bulky to carry in the field, although FortuneCookie45LC has a video
showing how he carries his in the field
https://www.youtube.com/watch?v=P-W6FiBrV3I. For
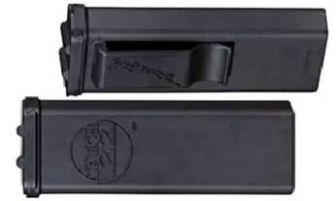
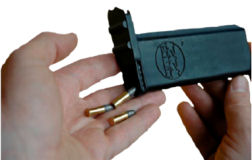
field use I carry two Marble Arms Catch .22 ammo carriers.
Each carrier holds 50-rounds in ten 5-round pockets.
The top slides open to expose one pocket at a time.
Each carrier comes with a molded-in belt clip so I have 100-rounds at the
ready. To load the rifle, I pour from the
Catch .22 pocket directly into the magazine tube.
|