Installing
a Recoil Pad
by Roy Seifert
Click here to purchase a
CD with this and all Kitchen Table Gunsmith Articles.
Disclaimer:
This article is for entertainment only and is not to
be used in lieu of a qualified gunsmith.
Please defer all firearms work to a qualified
gunsmith. Any loads
mentioned in this article are my loads for my guns and have
been carefully worked up using established guidelines and
special tools. The
author assumes no responsibility or liability for use of
these loads, or use or misuse of this article.
Please note that I am not a professional gunsmith,
just a shooting enthusiast and hobbyist, as well as a
tinkerer. This
article explains work that I performed to my guns without
the assistance of a qualified gunsmith.
Some procedures described in this article require
special tools and cannot/should not be performed without
them.
Warning:
Disassembling and tinkering with your firearm may
void the warranty. I
claim no responsibility for use or misuse of this article.
Again, this article is for entertainment purposes
only!
Tools
and firearms are the trademark/service mark or registered trademark
of their respective manufacturers.

Introduction
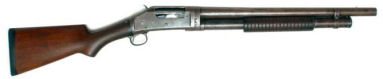
If you’ve been keeping up with my articles you know that I
purchased Winchester 97 pump-action shotgun for use in
competition. I
wanted to perform some modifications to make my gun more
competition friendly (refer to my article Modifying
a Winchester 97 for Competition). One
of the modifications I wanted to perform was to install a
recoil pad to not only dampen some of the recoil, but to also
adjust the length of pull (LOP) of my gun.
Ok, I’m shooting light target loads, but still I
wanted to customize my gun to fit my particular needs.
Cutting
the Butt Stock
I did some research on the Internet and found a number of
methods for measuring LOP, but it boils down to how it
ultimately feels to the shooter.
With my gun mounted on my shoulder and standing in a
shooting position I measured from the tip of the nose to the
first knuckle of the thumb.
My measurement was exactly 2-inches.
For correct LOP this measurement should be between 1”
and
1 1/2“. To
facilitate loading with my right hand I wanted the stock to be
a little bit shorter so I decided to remove 1”, and since
the new recoil pad I was adding was 3/4“ I would have to
remove 1 3/4“ inches from my butt stock.
The other
measurement I needed to take into account was pitch.
Pitch can best be described as the angle of the butt in
relation to the receiver and barrel.
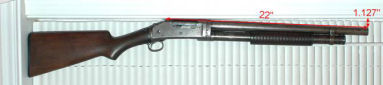
I set the butt flat on a window sill so the end of the
receiver was just touching the edge of the window frame.
As you can see in the above photo the barrel was angled
away from the window frame.
So this gun has up or positive pitch.
(Think of it this way, you have to climb up
hill from muzzle to receiver.)
You will almost never see neutral or down (negative)
pitch. Negative
pitch would have the heel of the stock (top) sticking out
farther from the toe (bottom) which would make it difficult to
mount and could cause bruising of the shoulder.
To find the
degrees of pitch I measured the distance from the window frame
to the tip of the barrel which was 1.127”.
The distance from the point where the receiver touched
the window frame to the end of the muzzle was 22” which
formed the hypotenuse of a right triangle.
So using the formula ARCSIN(1.127/22) gave me an angle
of 2.9 degrees of positive pitch.
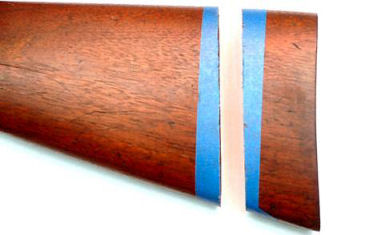
I removed
the stock from the receiver and put a strip of masking tape
around the stock where I planned to cut.
I adjusted the fence on my table saw to cut 1 3/4”
and laid the butt against the fence.
I adjusted the miter gauge so it was in line with the
top of the stock at the 2.9-degree setting and cut the stock.
Modifying
the Miles Gilbert Recoil Pad Fixture
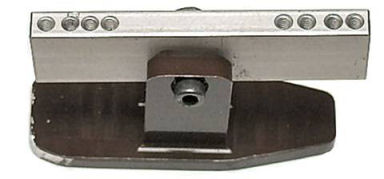
I have
installed grind-to-fit recoil pads in the past with moderate
success. The
hardest part of the process is sanding the heel and toe lines
to match the lines of the butt stock.
I purchased a Miles Gilbert recoil pad installation
fixture from MidwayUSA #658338
to facilitate proper shaping of the pad.
This fixture consists of an aluminum base with two
prongs, a pivot arm drilled and tapped to accept various types
of recoil pads, and the associated hex-head screws, tools, and
washers. The first
thing I found was that the base was too long and would not
allow me to completely sand around the recoil pad.
I didn’t want to have to remove and readjust the
fixture to grind each end of the pad, so I decided to make a
sliding base for the fixture.
There is nothing I hate worse than spending good money
for a tool that doesn’t work as designed!

First I cut
the front and rear off of the base leaving just the two
prongs. Then I
drilled and tapped two 10-32 holes in the base.
These holes will accept 10-32 hex head screws to mount
to my sliding adjustable base.
Two holes will prevent the fixture from turning while
mounted to the base.
Next I
fabricated a new base out of 1/2-inch aluminum.
I milled a slot 0.325-inches wide by 3.325-inches long
and 1/4-inch deep. This
slot will hold the fixture mounting hex-head screws flush with
the bottom of the base. Then
I milled a slot 0.2-inches wide by 3-inches long through the
center of the larger slot.
This narrower slot will hold the screws.
Finally I milled the base in the approximate shape of
the original Miles Gilbert base.
Installing
the Recoil Pad
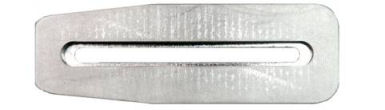
I purchased a grind-to-fit Kick Eez® recoil pad from
MidwayUSA #926512
to add to the butt stock to help dampen some of the recoil.
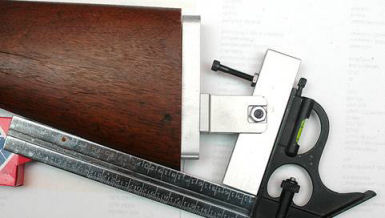
The original butt stock measured 1 5/8” wide by 4
7/8” long; the new recoil pad measured 2” wide by 5 5/8”
long and 3/4“ thick so there was plenty of pad to grind off
and fit.
When I cut
the stock I also cut off both mounting holes so I had to drill
two new holes. This
is much better than having to fill and re-drill an existing
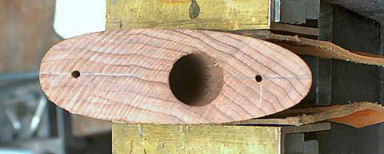
hole. I marked the
center of the butt stock and marked where I wanted to drill
the first hole. I
used a #28 drill bit to drill the first hole, then drove the
screw into the hole to cut the threads.
I mounted
the recoil pad onto the butt stock with the first screw and
inserted the second screw.
I rotated the pad so the second screw would leave a
mark; where that mark intersected the pencil line I drilled
the second hole, then drove a mounting screw into that hole to
cut the threads. After
the holes were drilled and tapped I mounted the oversized
recoil pad onto the butt stock.
With the
pad mounted onto the butt stock I scribed a line around the
outer edge of the butt stock, and then I removed the pad.
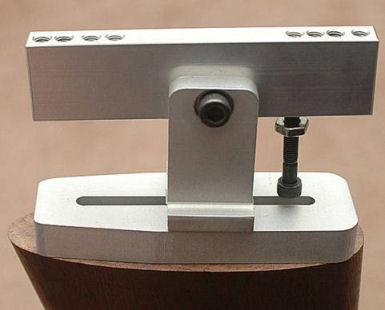
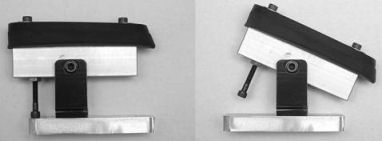
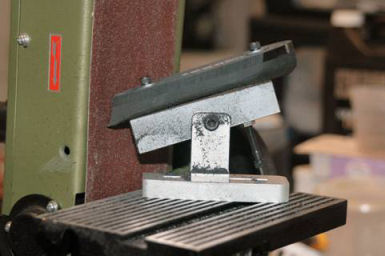
I assembled
the fixture as shown in the above photo.
The longer side of the pivot arm is facing the narrow
end of the base. I
placed the base on the on the butt stock with the narrow end
toward the narrow end (toe) of the stock.

I placed a
square on top of the fixture and rotated the arm until the
square was lined up with the line of the comb.
I tightened the pivot screw, then adjusted the
adjustment screw until it just touched the base.
I tightened the lock nut so the adjustment screw would
not move.
I moved the
square to the toe and rotated the arm until it was in line
with the toe, then I tightened the pivot screw.
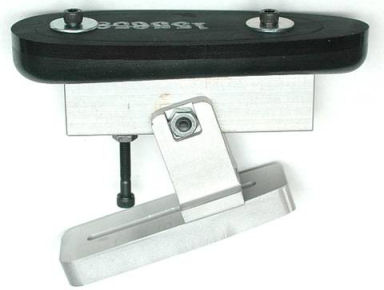
I mounted
the recoil pad upside down onto the fixture.
Now I’m ready to sand.
The instructions that came with the fixture recommended
80-100 grit, but I used a 120-grit sanding disc on my sander
to get it to be smoother.
Since the
fixture is set up to grind the toe line, this is where I
started. I sanded
from the middle of the pad on each side around to the toe.
I sanded just up to my scribe line.

I loosened
the pivot pin and rotated the arm until the adjustment screw
was against the base, then tightened the pivot screw.
I then sanded again from the middle of the pad around
to the comb line up to the scribe line.
I took some
220-grit sand paper and rounded the sharp edge on the soft
surface of the recoil pad that was left from the grinding.
I also sanded the newly ground sides to smooth down the
surfaces. I
finished by coating all surfaces with paste wax.
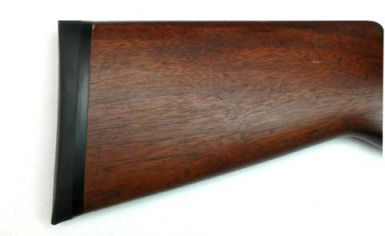
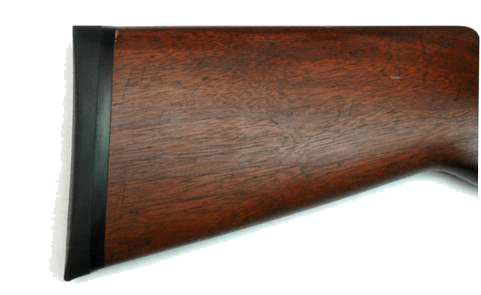
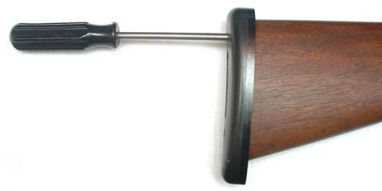
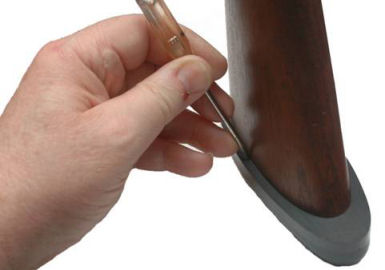
I installed
the butt stock onto the receiver, then installed the recoil
pad onto the butt stock. I
was really quite pleased with the results.
The length of pull is now much better for me and the
gun fits my shoulder very well.
I can reach the ejection port much more easily with my
right hand for loading single shells for cowboy matches.
|