Initial Inspection
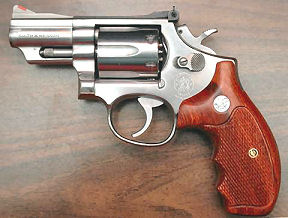
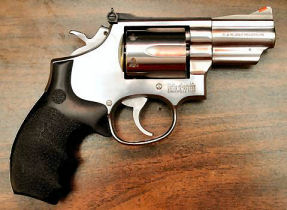
When I received the revolver, I performed an inspection like I do for
all firearms that I purchase. The gun
was clean (surprise!); the frame and crane were strait, ejector rod was not
bent, and the bore was clean and bright.
There did not seem to be any problems with timing. The grips were after-market and did not allow
easy use of a speed-loader.

I immediately noticed that the slots in the screw heads were wobbled,
indicating someone used the wrong sized blade to remove them, and there were
scratches on either side of the yoke screw.
These are strong indications that someone had been inside.
One major problem I discovered was that the revolver experienced hammer
push-off. With the hammer cocked in single-action
mode, when I pushed on the hammer with my thumb, it released from the sear and
fell. This is a very dangerous situation! Someone probably tried to polish the sear
without using the proper jig and rounded it.
Many comments on the Internet said to cut off the hammer spur to make it
into a double-action only firearm, but I wanted the gun to function as designed.
Disassembly
Before disassembling the revolver, I watched GunBlue490’s video Disassembly and Care of the S&W Revolver
~ Learn how to from a Factory Trained Armorer!
Here is the link to that video:
https://www.youtube.com/watch?v=4ujyLn3lHBc
I disassembled the revolver following GunBlu490’s video. Brownells sells specific
screwdriver bits made to fit S&W revolver screws.
https://www.brownells.com/gunsmith-tools-supplies/general-gunsmith-tools/screwdrivers-sets/magna-tip-bit-sets/s-w-combo-bits-only-sku080087002-406-42598.aspx?rrec=true
I always use the correct screwdriver bit
that fits the screws so I don’t bugger them. I used these bits to remove the screws and prevent
any further damage to them. I did
purchase a new set of screws (see below) because I wanted the gun to look good,
not buggered.
Inside I discovered the moving parts were coated with an excessive
amount of oil, some of which had congealed into a sticky goo. I used acetone to remove the residual oil and
generally clean the inside.
Polishing the Sear
Warning: Do not attempt to polish the sear without a
proper jig. Polishing the sear by hand
can cause rounding of the sear and a dangerous, unsafe condition.
There are several incorrect videos
on YouTube showing how to polish the sear by hand. This should never be done without a jig as
mentioned above. MidwayUSA’s Larry Potterfield has an excellent and correct video called Gunsmithing - How to Lighten and Smooth the
Trigger Pull on a Smith and Wesson (S&W) Revolver. Larry shows how to polish the internal action
parts of the revolver. Here is the link
to that video:
https://www.youtube.com/watch?v=HJ6Hb89lVXw
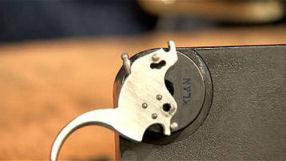
I examined both the sear on the trigger, and sear notch on the
hammer. The sear notch was very shallow,
but still looked sharp under a magnifier.
The sear on the trigger, however, was rounded. The hammer and sear are case hardened, but
the hardening only goes 4-6 thousandths deep, so any polishing must be very light,
and not aggressive to break through the hardening.
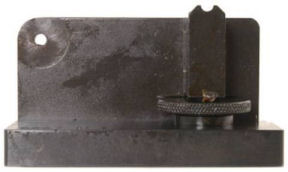
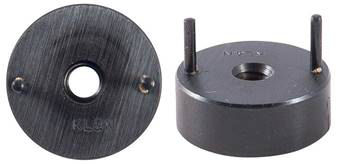
I installed the K, L, N adapter onto my Power Custom Series I Stoning
Fixture as shown in Larry’s video. The
adapter and fixture are both available from
Brownells and
MidwayUSA. The instructions that came with the jig
stated to move the adjustable guide up 20 clicks. I coated the sear with blue marker to ensure
I was polishing the sear flat.
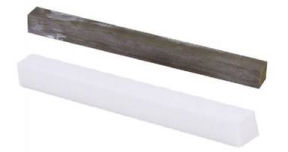
Long ago I had purchased medium-fine and extra-fine ceramic stones from
Brownells for polishing hammers and sears. These stones use water as the cutting/cleaning
agent.
https://www.brownells.com/gunsmith-tools-supplies/metal-prep-coloring/stones/6-x-1-2-x-1-2-ceramic-stones-prod799.aspx
I used the medium-fine stone to reshape the sear nice and flat so the front edge was sharp. I final polished with the extra-fine stone to
get a mirror polish.
Reassembly
I lubricated the inside of the revolver as shown in GunBlu490’s video
and reassembled the revolver. I used BreakFree CLP as the lubricant because it leaves behind a
very thin coating of Teflon. I installed
a Wolff K, L, N spring kit which reduced the double-action trigger pull from 7 lbs 8 oz to 5 lbs 2 oz. The revolver now functions correctly with no
hammer push-off. Hopefully, I didn’t
remove the case hardening from the sear so it won’t accelerate
wear.
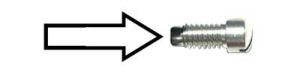
New Screws
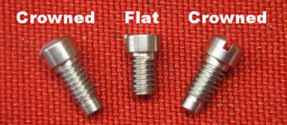
I purchased a set of stainless-steel frame screws from eBay for $25.00
which I thought was very reasonable. I
just didn’t like the look of the buggered screw heads. The set consisted of two crowned side plate
screws, and one flat-head side plate screw.
The flat head screw fits underneath the grip, the two crowned screws fit
in the other two holes.
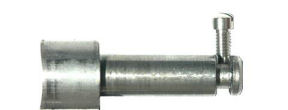
Fitting the Yoke Screw
The front screw is also the yoke screw and must be fitted so the bottom
of the screw doesn’t touch the yoke causing it to bind. The sides also cannot bind against the groove
milled in the yoke. The yoke must be
able to rotate freely with a minimum of front to back movement.
When I attempted to install the yoke screw into the frame
without the cylinder and yoke installed, the screw was very tight in the
threads. When I examined the original
yoke screw, I noticed that the threads were flat, not sharp like the new screw.
I wrapped a piece of 320-grit wet/dry sand paper around the
threads, pinched it between my thumb and finger, and used a screwdriver to turn
the screw back and forth a few times to flatten the threads. I cleaned the threads with alcohol and tried to
screw it into the frame. The first time
the screw was still tight, but after a second time the screw fit with no
problem.
As mentioned before, when manufactured, the yoke screw is
the same length as the crowned side plate screw. However, it is too long to serve as the yoke
screw. If installed as is, the end of
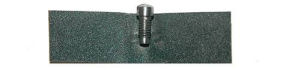
the screw will rub against the yoke causing it to bind. I coated the end of the screw with a marker
and rubbed it on the 320-grit wet/dry paper to reduce the length, then installed
the screw to test the fit. I didn’t
tighten the screw; I turned it down until I just felt some friction. I opened and closed the cylinder and if I
felt any binding, I removed more metal from the end of the screw. I continued to remove metal and test fit until
I could tighten the screw and open and close the cylinder with no binding.
Because this screw is now fitted it must be installed in
this position. Installing the other
crowned screw in the yoke screw position will cause the cylinder to bind.
There now, doesn’t that look better? Eventually I will probably try to buff out
the scratches, but that is a project for another time. I also installed a Hogue mono-grip because I
like the look and how it feels in my hand.
Other folks don’t like the rubber grips because they catch on clothing
when carrying concealed, but I wanted to try them out. The wood grips that came with the gun caused
speed loaders to bind, but the rubber grips do not get in the way of the speed
loaders.
Conclusion
Working on trigger sears should NEVER be attempted without
the proper jig. Yes, these tools are
expensive, but not nearly as expensive as replacing damaged parts. And using proper sized screwdriver bits
prevents screw heads from becoming buggered.
Damaged screw heads are a sure sign of amateur work.