Installing
an Extended Magazine Release Button on a Ruger® 22/45™
by Roy Seifert
Click here to purchase a
CD with this and all Kitchen Table Gunsmith Articles.
Disclaimer:
This article is for entertainment only and is not to
be used in lieu of a qualified gunsmith.
Please defer all firearms work to a qualified
gunsmith. Any loads
mentioned in this article are my loads for my guns and have
been carefully worked up using established guidelines and
special tools. The
author assumes no responsibility or liability for use of
these loads, or use or misuse of this article.
Please note that I am not a professional gunsmith,
just a shooting enthusiast and hobbyist, as well as a
tinkerer. This
article explains work that I performed to my guns without
the assistance of a qualified gunsmith.
Some procedures described in this article require
special tools and cannot/should not be performed without
them.
Warning:
Disassembling and tinkering with your firearm may
void the warranty. I
claim no responsibility for use or misuse of this article.
Again, this article is for entertainment purposes
only!
Tools
and firearms are the trademark/service mark or registered trademark
of their respective manufacturers.
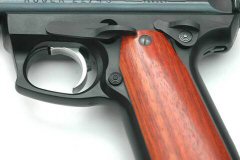
I
recently converted the grip frame of my Ruger® 22/45™ to
accept 1911 grips (refer to my article Converting
a Ruger® 22/45™ to Accept 1911 Grips).
However, the new grips were thick enough that it was
difficult to press the magazine release button.
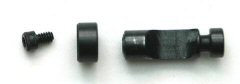
So I decided to install an oversize magazine release
button. These
buttons are designed for 1911 pistols, but will also fit on
the 22/45™. I
purchased one manufactured by Ed Brown from Midway
USA.
First I
made sure the gun was unloaded, and then I completely
disassembled the grip frame.
The instructions that came with the button stated that
I needed to drill a 3/32” hole in the center of the magazine
release to a depth of 1/4“.
They recommended using a 3/32” ball end milling bit.
Since I have a mill and a 3/32” ball end bit, this is
what I used to mill the hole in the center.
Next I took
a 4-40 tap and carefully tapped the center hole using plenty
of tap oil. Since
all I had was a taper tap, I ground some of the end off to
make it a more like a plug tap.
This allowed me to tap more threads before bottoming
the tap in the hole. The
milling and tapping process left a slight burr around the top
of the hole, which I removed with a flat jeweler’s file.
I cleaned
the tapped hole with a shot of brake parts cleaner and
reassembled the grip frame.
The grip panel was now interfering with the extended
magazine release button so I had to grind a relief in the edge
of the panel so the magazine release would move freely.
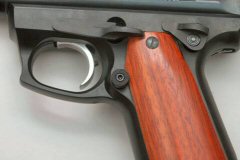
Prior to
installing the new button I put a drop of Loctite blue on the
threads of the set screw so it would not come loose.
Now I can reach the magazine release very easily with
my right thumb.
Although I
used a mill to make the hole, if I was going to use a 3/32”
drill I would have used the extended button as a guide to
ensure the hole was centered, and I would have used a drill
press to ensure the hole was straight.
|
