|
|
Shooter Solutions™
Rugged Gun Blue
by Roy Seifert
Click here to purchase a
CD with this and all Kitchen Table Gunsmith Articles.
Disclaimer:
This article is for entertainment only and is not to
be used in lieu of a qualified gunsmith.
Please defer all firearms work to a qualified
gunsmith. Any loads
mentioned in this article are my loads for my guns and have
been carefully worked up using established guidelines and
special tools. The
author assumes no responsibility or liability for use of
these loads, or use or misuse of this article.
Please note that I am not a professional gunsmith,
just a shooting enthusiast and hobbyist, as well as a
tinkerer. This
article explains work that I performed to my guns without
the assistance of a qualified gunsmith.
Some procedures described in this article require
special tools and cannot/should not be performed without
them.
Warning:
Disassembling and tinkering with your firearm may
void the warranty. I
claim no responsibility for use or misuse of this article.
Again, this article is for entertainment purposes
only!
Tools
and firearms are the trademark/service mark or registered trademark
of their respective manufacturers.
Introduction
Corrosion is a firearm’s worst enemy.
Gun metal needs to be protected from corrosion.
Moisture from the air, moisture and oils from our
hands, even salt in the air if we live close to the ocean can
all contribute to the formation of Fe2O3 iron-oxide,
otherwise known as rust. Over
the decades firearms manufacturers have devised various
methods to protect the metal.
Today, the most common protection is called bluing.
Bluing
is a process in which steel is partially protected against
rust, and is named after the blue-black appearance of the
resulting protective finish.
True gun bluing is an electrochemical conversion
coating resulting from an oxidizing chemical reaction with
iron on the surface of the metal.
The resulting black oxide provides minimal protection
against corrosion, unless also treated with a water-displacing
oil to reduce wetting and galvanic action.
This explains why blued firearms must also be oiled,
and why surface rust appears on blued firearms that are not
kept oiled.
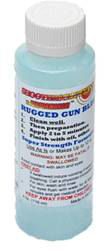
Shooter
Solutions™ Rugged Gun Blue
Modern firearms are typically hot blued; something that I, as
a home hobbyist gunsmith, am not set up to perform.
Both "cold" and "hot" bluing are
oxidizing processes, but only the "hot" process
provides any significant rust and corrosion resistance…until
now thanks to Shooter Solutions™ Rugged Gun Blue.
Shooter
Solutions™ (www.ShooterSolutions.com)
Rugged Gun Blue is a cold bluing solution that actually reacts
and converts the base metal similar to hot bluing making it
more rugged than other cold bluing products that just apply a
coating to the surface. With
Rugged Gun Blue I can now blue an entire firearm, or touch-up
small areas where factory bluing has worn off or metal has
been exposed from milling, filing, or cutting, and get
virtually the same protection as hot bluing.
The instructions that come with the product are a
little bit difficult to plow through and understand, but the
basic formula for success is fairly easy.
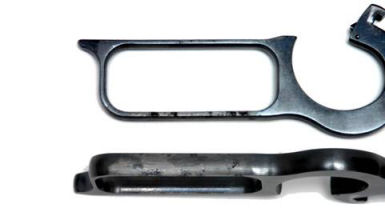
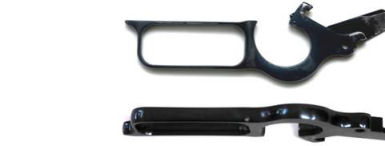
I
have a Marlin 1894 Cowboy rifle that I purchased used many
years ago. The
previous owner had wrapped the lever with leather, which must
have been chrome-tanned because it corroded the metal and ate
away the finish. Chrome-tanned
leather leaves tanning salts behind which will corrode metal.
Leather that will sit against metal – like holsters
– should be vegetable-tanned.
A new lever costs about $60.00 but I can restore my
existing one for much less using Rugged Gun Blue.
- Wear
vinyl or nitrile gloves – this product is an acid so
gloves should be worn at all times.
Gloves also protect the prepared metal from
becoming contaminated by the oils from your skin.
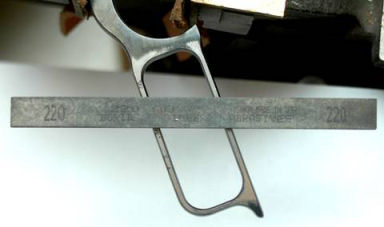
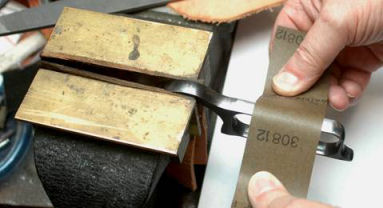
- Bead/sand
blast or sand the part if necessary – When I am building
a new gun, or restoring an older gun I bead-blast the
parts with glass bead media to get a soft, matt finish.
If I want a smooth finish I polish the metal with
progressively finer grits of silicon/carbide wet/dry sand
paper.
For a gun with factory bluing, you do not have to remove
all the old bluing; Shooter Solutions™ instructions state
that Rugged Gun Blue can blend with factory bluing.
- Degrease
– I use acetone. It
is important to remove any grease or oil from the metal so
the Rugged Gun Blue can work on the base metal itself.
It is also important to remove any metal dust from
sanding, cutting, or milling; otherwise the solution will
react with the metal dust and not the base metal making
the result less rugged.
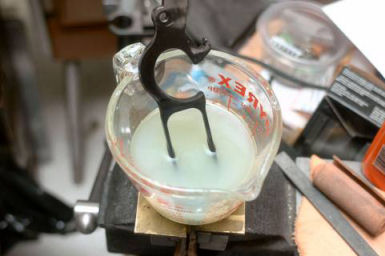
Note:
The solution is milky because I have been using it and
it has some impurities in it.
- Dip
or soak the part in the Rugged Gun Blue solution until it
is dark blue/black – properly prepared metal only
requires a few seconds, contaminated metal may take
longer. If you
leave the part in the bluing solution too long it can
start to eat away the base metal and change tolerances and
specifications. If
you can wipe off a black pigment/powder from the part,
then you have left it in too long.
You can also apply the Rugged Gun Blue using a brush so
long as you keep the part wet so the base metal has enough
time to react. Never
apply the solution with a cotton swab, rag, or paper towel
as these contain chemicals that can interfere with the gun
blue solution.
- Rinse
the part with water to remove the excess acid solution
- Dry
with a hair dryer, heat gun, or air compressor – You may
see some orange rust appear; this is normal and will
disappear when oiled.
- Apply
gun oil – I use a cotton swab soaked with gun oil to get
into all the corners, crevices, pin holes and screw holes.
Do not use Breakfree CLP or metal polish as they
will remove your newly applied gun blue finish.
The
solution can become contaminated over time, but you can filter
out many of the impurities by straining it through a coffee
filter. This is
good to know to extend the life of the solution.
Results
I
have used other cold gun blue products in the past and have
never been pleased with the results.
This is because most of them do not react with, and
convert the base metal so they are neither dark enough, nor
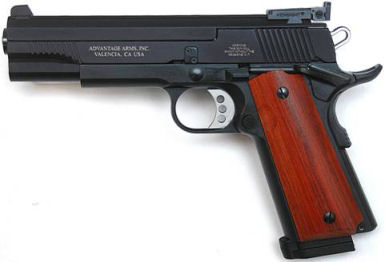
rugged enough. This
product absolutely amazed me by the color, depth, and evenness
of the result as you can see by the 1911 frame in the above
photo. I built a
dedicated 1911 .22LR using an Advantage Arms .22LR conversion
kit and a 1911 frame that I built up from parts.
The conversion kit already came blued, but notice how
the frame matches it perfectly.
I blued the frame, thumb safety, grip safety, and
mainspring housing using Rugged Gun Blue; I could not have
asked for better results.
Refer to my article
Building
a Dedicated 1911 .22LR Pistol.
Summary
Any time I expose bare metal I use cold bluing to protect that
exposed area. This
is especially important when polishing the internal area of a
blued firearm. Polishing
removes metal, and in so doing, also removes the protective
bluing. These
polished areas need to be re-blued to provide some protection,
and cold bluing is the least expensive means of providing that
protection. Cold
bluing also can enhance the appearance of an older firearm.
I have thrown away all my other cold bluing products in
favor of Shooter Solutions™ Rugged Gun Blue.
This is my go-to cold blue solution (pun intended) from
now on.
Rugged
Gun Blue comes in 4-ounce, 8-ounce, quart, and gallon sizes
and can only be ordered online from www.ShooterSolutions.com.
I keep a quart handy in my shop at all times, not only
for guns and gun parts, but for tools as well.
I
want to extend my thanks to Jonathan Doege, owner of Shooter
Solutions™, for taking the time to talk to me and helping me to
understand the chemistry of his Rugged Gun Blue and important
do’s and don’ts of using his product.
By the way, Shooter Solutions™ also makes a black
manganese Parkerizing solution with which I have refinished
five 1911’s and they all came out beautiful.
I highly recommend both of these excellent products.
|

